Friday, November 21, 2014

My Favorite Things 2014

I always miss the Oprah show most this time of year.  My favorite episode of Oprah was always her “Favorite Things” show around the holidays.  Since she stopped doing the show, I try and honor it with my own Favorite Things list – a list of the cake things I love and must haves for the coming year.  This year is no different!  With no further adieu, here are my Favorite Things for this year:


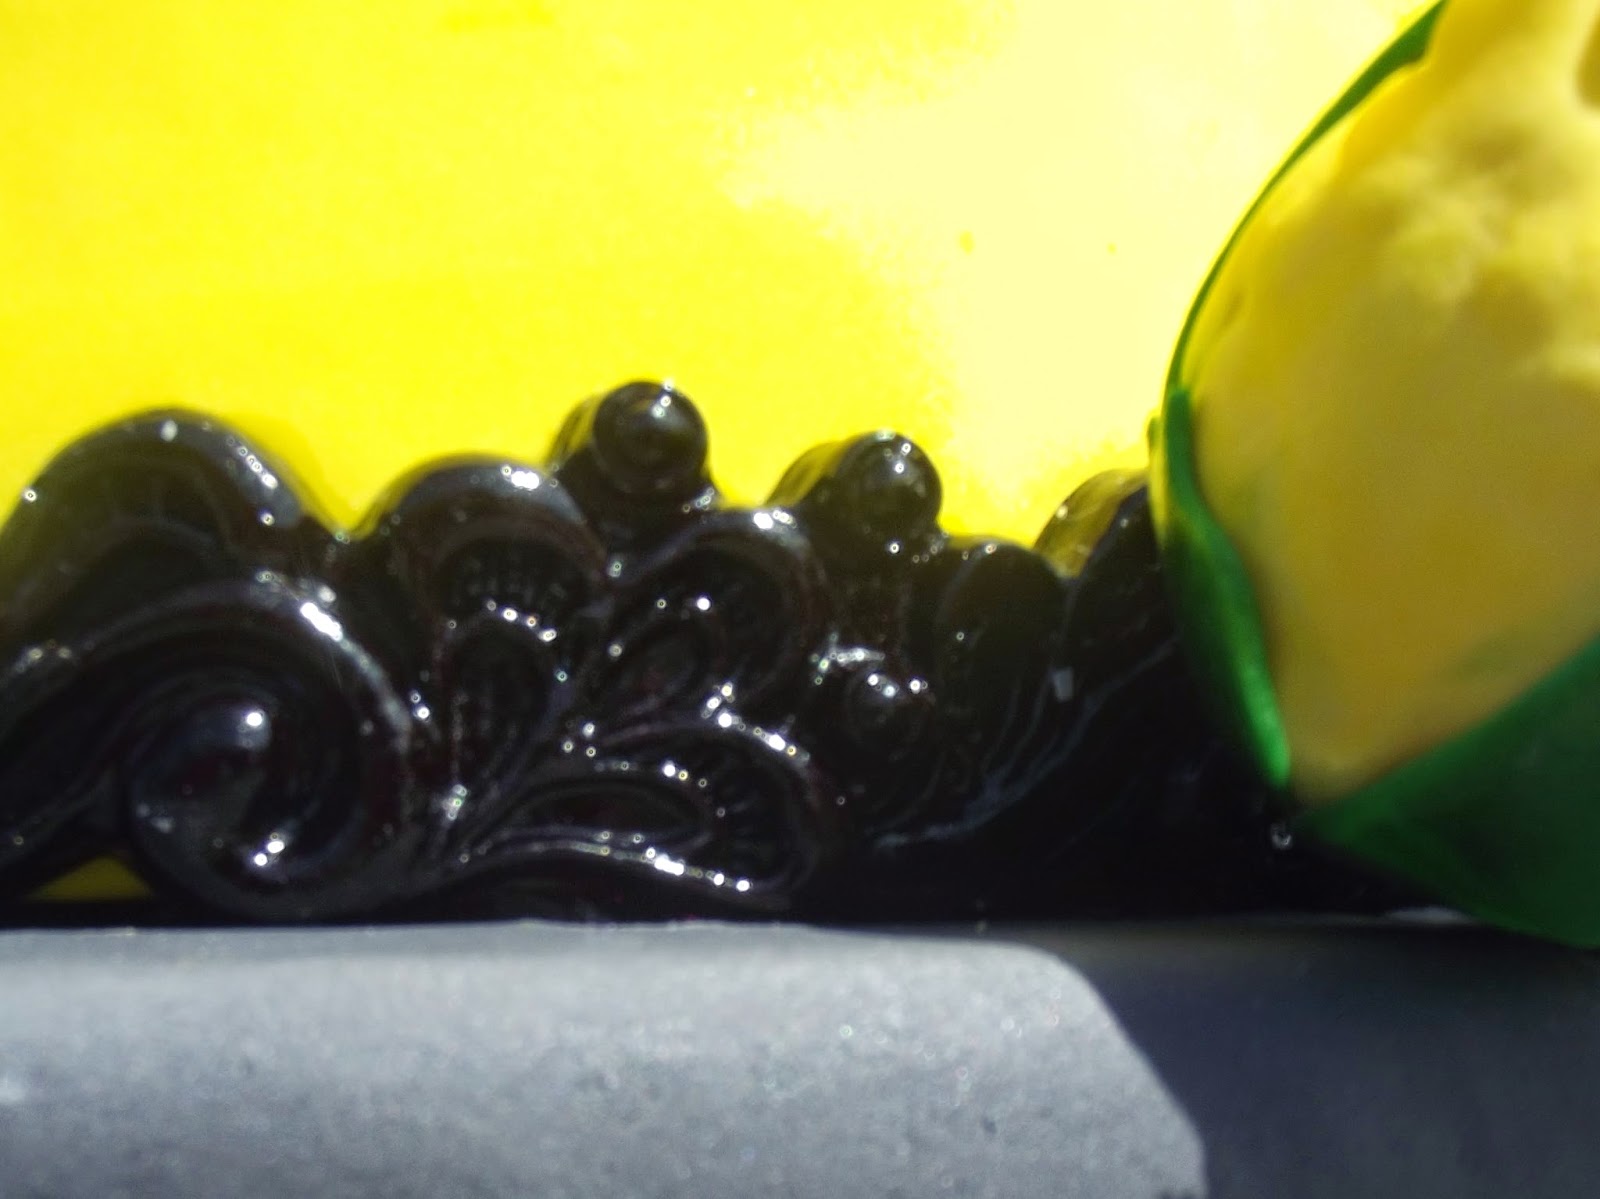
    Sugar Lace – edible lace has been hot over the past few years, and the competition is really heating up with more companies offering their spin on this product.  My favorite lace mix so far is Tricot by WonderCakes (Silikomart).  I have yet to try Cake Lace premixed lace mix (although I am dying to), but the Cake Lace line of lace mats have my favorite designs – including 3 recently released ones (Feathers, Steampunk and Juliet) topping my wish list - Santa, hope you’re taking notes!    


           Classes – either online or in person.  As an instructor, I love sharing my passion for sugar – especially live and in person.  If you can’t make it to a class in person, The Cake Tool Company has recently released my first video class, Timeless Wedding Flowers,  available for digital download.  In it, I teach roses, ranunculus, hydrangea, and calla lillies.  I also love taking classes, and Craftsy has some of the best out there – I highly recommend my current favorites on cake photography, “Smarter Display Cakes” by Chrissie Boon, and any of Jessica Harris’ classes.


      Speaking of Jessica Harris, I love her design templates.  Reasonably priced and help you create stunning cakes with minimal effort…perfect addition to any stocking (Santa, you reading this?)
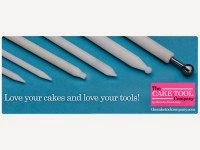
       Cake Tools Part One – the entire line from The Cake Tool Company.  I love their tools (keep reading, Christmas may come early for a lucky reader – superior quality, great prices, ‘nuff said!  My personal faves?  The turntables (low profile means no wobbling, and available in 4 sizes for all my various projects) and the DelrinBall Tool – food grade, seamless and it glides over my sugarpaste smoother than any ball tool I’ve ever used.


         Cake Tools Part Two – Sugar Shapers!  Y’all know I have a HUGE crush on Kaysie Lackey who worked with Innovative Sugarworks.  There are two different sets – soft and firm – designed to revolutionize the way you sculpt, shape, texture, and model flowers, figures, and embellishments.  They are the perfect size and weight to work the way quality tools should work, and they are textured to maximize grip.  Best of all, each tool is double sided which means you double up on all of the tool awesomeness!  I have a set of each already.  Santa – you still reading?  Good….please ask the nice folks at Innovative Sugarworks to come out with a miniature version of the sets now for all of my finer detail work – I’ve been a good boy this year, promise!  I got mine   here.


     Petal Dusts – Love my Sugar Art brand dusts!  Can’t say enough great things about them!  And they are bringing Christmas to us early.  For the rest of November, visit their website and save 40% off almost everything on their website (except James Rosselle color kits and airbrush systems – which I still have on my wishlist – ahem, Santa?)


      And one last one….no, you’re not all getting a car!  But you need to buy yourself this favorite thing or be really nice to Santa to make sure you get it.  CakeCarnival 2015 – THE hottest class of the year!  3 projects, 6 instructors in teams of 2, 3 days = lots of fun!  You know I loved taking part in Cake Carnival 2013, and am counting the days to the 2015 edition – wedded bliss!  Seats are selling super fast from what I hear, so you really need to be nice to Santa!!!

Prize time!  I’m giving away a prize pack of some of my favorite things!  This pack includes my favorite paintbrushes, brush rest, dotting tool, a stainless ball tool from The Cake Tool Company, and a pump brush from The Sugar Art.  How do you win?  Make sure to follow my Facebook page, follow my blog, and leave me a comment below telling me what your favorite cake toy is.  I’ll pick a winner at random next week and announce it on my Facebook page.


I know we are coming up to the busy Holiday season, and in case I don’t get back here before then….no matter what your faith, I wish you and yours a happy holiday season and a prosperous New Year.


Happy Caking!

Tuesday, October 7, 2014

The Teaching Conundrum

Hey cake land!

I love teaching!  I also love taking classes and building on my skill sets!  I work hard to preparing classes that I think people would enjoy and take away from.  I also work hard to make the money required to travel to take classes or purchase classes online.

Lately, I've noticed an increase in requests for either free instruction or to have me re-teach a class I took.  Here are a couple of examples of what I am referring to....

As you know, The Cake Tool Company recently launched my DVD, "Timeless Wedding Flowers".  Some people have purchased it, others have commented on the pictures online stating, "you should do a tutorial" or "how did you make your ranunculus?".  Then they get upset when you answer that they can purchase the DVD online and watch as often as they want!  I have no problem doing free tutorials for magazines, or my blog on basic things.  A lot of time and effort went in to preparing the DVD, and if I were to teach it as a class, it would easily be 2 days and cost about $350......The DVD is $34.99.....a fraction of the cost of me teaching it live.

Here's another example that applies to taking classes (including Craftsy).  I recently took Joshua John Russell's Haute Couture Cake class at Icing Inspirations.  My class cost was not just the class itself - I rented a car to travel there and back, gas, food and hotel.  I posted the picture and within a few hours had multiple messages asking me if and when I would teach it here in Montreal.
Here's where I have an issue.  As an instructor, I do not want my students taking what I taught and turning it into a class of their own.  Can I control it?  Absolutely not!  What I can do, is hope that people see that by my NOT teaching a class that I have taken, they will see the level of respect and integrity that I have for myself and fellow instructors.  Until students can understand this point, things won't change, and in turn it cheapens the learning experience for teachers and students equally.  I hope taking this stance shows people that I am an instructor that takes his love for the craft seriously and wants to offer his students classes that they can appreciate the work that goes into planning classes.  Where it is OK to teach a technique you didn't develop, is say where you saw a picture online and taught yourself, or you modified something you learned in a class and made it your own.

I would hope, as an instructor, that if someone was going to teach something similar to something I taught, that they would have the decency to contact me and say they were teaching it.  I just finished co-teaching Macabre Sugar Flowers.  One of the flowers I taught was the Dahlia - a flower I recently made in class with James Rosselle.  Now I had made them prior to James' class, and my technique was slightly similar to his.  I was not teaching his techniques, but I was still respectful enough to contact him and give him a heads up that I was teaching Dahlia and assured him I was not teaching his methods - simply because I respect him as an artist and a person.

I really hope in writing this, people were not offended.  It was not my intention.  It was simply something I needed to address as it has been asked a lot of me lately, and I really wanted to help people understand why I won't teach something I learned directly from someone else or why I won't just give my methods away for free.

Until Next Time,
Happy Caking!

Sunday, September 28, 2014

Macabre Sugar Flowers Class

Hi Cakeland

Although the leaves are starting to change here in Montreal, we're still holding autumn off as best we can - it was a super nice weekend, and we made sure to take advantage of our pool still being open.  It was nice to sit back and relax - it has been a busy week with the launch of my DVD, "Timeless Wedding Flowers" as well as prepping my next live class - Macabre Sugar Flowers.  Macabre Sugar Flowers is the result of a collaboration with my sweet friend Suzanne of Savauri Sugar.  We will be teaching this full day class on Sunday October 5th at 9am at Kitchen Jukebox.  As of this post, only 1 SEAT REMAINS, then a waiting list will start.


For only $150, you will learn to work with isomalt, make gumpaasste dahlia and succulents, make a fantasy wafer flower as well as learn how to make marbled fondant look like a real slab of marble!  Although halloween themed in nature, these techniques can translate to flowers for other cakes as well.  And as an added bonus, one lucky student will be going home with some swag courtesy of the Cake Tool Company.

If you want to fill that last spot or get on our waiting list, please contact me so arrangements can be made.

Until next time,
Happy Caking!

Thursday, September 18, 2014

Timeless Wedding Flowers Has Arrived!

Hi Cakeland!

In my last post, I wrote about a project I had worked on for The Cake Tool Company that involved a video camera or 2.  I am so very happy to share with all of you that my latest teaching endeavor is now available for sale at http://www.thecaketoolcompany.com/index.php/cake-decorating-tutorials-dvd-3/dvds/timeless-wedding-flowers .


Timeless Wedding Flowers is 2.5 hours of HD instruction where I teach you to make the 4 most requested flowers brides are asking for - Hydrangea, Calla, Ranunculus and Roses.  I show my methods for making these flowers from start to finish, including how to color them to look (and even smell) like real flowers!  As an added bonus, I have included a lesson on arranging the flowers 2 different ways!

I am very pleased with the end result and can't get over how great my team at The Cake Tool Company made this DVD!  The have been awesome to work with!  And for a limited time, The Cake Tool Company is giving a FREE ruffle stick to every customer that purchases the DVD format!  I love this tool so much, and I even show you a cool application for it in the class!

This is the first of many planned DVDs and I owe it all to you - my readers and students!  I want to produce classes to make you all happy - so please leave a comment and let me know wht else you'd like to learn!

Happy Caking :)
Mark

Saturday, September 6, 2014

Lights, Camera.......

Hi Cakeland!

It's been a while, but I've been super busy, and busy is good!  A few weeks ago, I taught at Sweet House Cake & Candy Supply in Las Vegas and had a blast!  Thanks to my sponsors - The Cake Tool Company, The SugarArt, Simi Cakes & Confections, and Fondarific, prizes were given away in all 3 of my classes!!

I've also been hard at work on a few TOP SECRET projects, one of which happened today and I can finally share with you guys.  I've been dying to share this secret for a while now.  As you know from my previous posts, I am a proudly a member of The Cake Tool Company family - working as one of their sponsored artists.  Now this position comes with a lot of great perks - the opportunity to work with great tools and an amazing family company!  One of the other perks is that they are all about educating and helping artists grow their skills.  Today, I was able to contribute to their vision of educating the cake community.  Today, I filmed my first video class :)


I have been a ball of emotions leading up to this project - experiencing all kinds of feelings simultaneously most often nervousness and anxiousness - all worth it.  Thanks to my crew - Bunny and Harry, filming went smooth and didn't take nearly as long as I thought it would!  I won't go into details just yet as to what the content of the class is - I'll leave that for a future post and maybe a contest ;)  What I can say about it is that it was a memorable day, and I really think that you all are going to enjoy it - at least I hope you do!  A lot of myself went into planning the class and I do think it is a good point to start what will be a series of classes.  I can also say that it does feature sugar flowers, and I have changed up a few of my techniques to put a new spin on some classics.

This is just the start of more amazing things to come from the Cake Tool Company and I am honored to be a part of it!  Keep your eyes posted here for more updates about the class launch, contests, and promotions.    And now that the proverbial cat is out of the bag, leave me a comment below, and tell me what flowers you'd like to see in future lessons :)

Next week, I am off to class at Icing Inspirations with Joshua John Russell and Karen Portaleo - very excited, and wiil be sure to share my experience with you!

Until Next Time,
Happy Caking

Friday, August 1, 2014

New Product Review - Cake Tool Company Part 1

Hi Cakeland!

Happy ICES weekend!  A few weeks ago, I announced I have proudly joined the Cake Tool Company family as one of their sponsored designers.  One of the perks (and there are many more to come, so stay tuned) of my job, is that I get to use their tools designed by Mercedes Strachwsky - one of the world's premiere cake designers.Since the line is so amazing, I am going to break my review down into multiple blog posts.

I couldn't get over how fast I received my new tools - and after reading online reviews, it wasn't fast because I am part of their team - everybody that has written reviews on their website have given them props for speedy shipping!  Just the feel of the tools was phenomenal!

I'd say I have two favorites right out of the gate - the delrin ball tool and the stainless steel ball tool.  The delrin ball tool is one piece of seamless hard plastic with a different sized ball at each end.  For a flower maker like me, the fact that it is seamless is crucial, as it allows me to work my gumpaste without marring it.  I love how it just glides over each petal effortlessly with very little pressure.  It is lightweight and very durable!

My other favorite - the stainless ball tool - looks like your normal good quality stainless ball tool with two exceptions - the brushed stainless steel is seemless (again, crucial!) and the delrin handle is actually food safe and doubles as a small 6 inch rolling pin - perfect for working with small pieces of paste.  Gotta love a 2-fer!

If you want to check out their full line of tools, click the logo and treat yourself to the best quality tools I have seen in a loooong time (and no, I am not paid to say that!).  And this weekend only, in honor of the annual ICES convention, The Cake Tool Company is giving all cakers a 25% discount regardless of if you are at convention or not!  Simply use promo code ICES25 at checkout.  And if you are able to be at convention, please swing by the Satin Ice booth where Mercedes will be doing demos all weekend and showing off these phenomenal tools!  Make sure to give her a big hug for me if you do!


I will be making my teaching debut teaching with the tools at Sweet House in Las Vegas, NV on August 18th.  If you would like to attend one of my 3 mini classes, register here.  I will be giving away prizes in each class, including a tool or two courtesy of The Cake Tool Company!

Until Next Time,
Happy Caking!

Wednesday, July 16, 2014

Big Changes Coming!

Hi Cakeland!

As I gear up to kick off my fall classes - starting with my classes at Sweet House in Las Vegas NV - I am very excited to be embarking on an new journey in my cake career!

Only my family and very close friends were in on the secret until late last week when I took to social media to make the official announcement.....I am over the moon excited to tell you all that I have proudly joined The Cake Tool Company family!


The Cake Tool Company is owned and run by the amazingly talented Mercedes Strachwsky and her family.  I have long been a fan of Mercedes' work since purchasing here pdf tutorial, "The Magic of the Sea" now available on DVD!

Having just launched a little over a month ago, I answered an open application on facebook for artists to join the team, and honestly wasn't sure what my chances were given the number of followers the company has.  Needless to say, when I checked my e-mail a couple of weeks ago, I had to make sure I wasn't dreaming (it was 5am afterall).  I had an e-mail saying Congratulations.  I thought I won something as I had entered a few contests they were sponsoring, and in all reality, I feel I have won....the first line actually read, "Let me be the first to say congratulations and welcome to the family"!  There was some details I needed to send which was followed up with a phone call.  All I can say is in a few short weeks, I certainly feel like I am part of the family.

The Strachwsky family has been nothing but welcoming and nurturing, helping me navigate these new waters I am swimming in!  It feels like such a great fit, that every time we speak, I feel even better about this venture!

So what does all of this mean?  Well for starters, I am a member of their team of artists hand chosen to help promote the brand.. You can view their retail store here.  I will be playing with all of the line in the coming weeks (you all know this boy loves his cake toys) and giving you feedback, tips and tutorials for working with these awesome, high quality tools (and maybe a giveaway or two).  It also means down the road you can expect to see more of me in the way of instructional DVDs (perfect for those of you who are to far to make one of my classes in person) and maybe even a few tools I design to help bring your sugar skills to the next level!

Please be sure to follow me and The Cake Tool Company on Facebook, and keep your eyes posted here for more updates on this awesome adventure I am starting!  In the meantime, please leave me a comment here and let me know what you think my first digital class should be!

Until Next Time,
Happy Caking!


Sunday, July 6, 2014

Free Tutorial - Gothic Lace Flower

I recently spent an amazing 3 days in Kitchener ON learning from my friend James Roselle as he was guest instructing at Icing Inspirations.  While I was there, I was able to pick up all the molds I pre-ordered from the Elissa Strauss fashion line.  On my drive home, I had a bunch of ideas going through my head, including one that I thought would be awesome on a goth style cake.

To make my Gothic Lace Flower, you will need:

Gumpaste (I prefer fondarific brand)
Spray Glaze
Gum Glue
Silver Highlighter
Lemon Extract

Start by making your center.  Make a small amount of grey gumpaste using the black gel color.  Take a tiny amount of the grey and color it black.  Use an even tinier amount of black, marble it in with the grey and cast your skull cameo.  Allow to dry overnight.


Mix some tricot lace medium using the package instructions.  To get black, I substituted in some black airbrush color by weight with the water.

Spread the medium over your lace mat (my mat is black, so I used a white mat for you to see it easier)


Bake according to package instructions (I usually leave it in until it is no longer tacky to the touch).
Remove leaves from mat and pace on bumpy foam to give them some shape and allow them to dry.

Paint the base of the cameo with highlighter mixed with lemon extract.  Allow to dry then spray with glaze – this will prevent the silver from coming off and will also help you achieve a true marble look to the skull.

Use a small circle of gumpaste as a base and adhere 3 of the same leaves to it with gumglue.  

Repeat with a second layer of leaves (different style) to fill in the spaces.  Add your skull cameo center and you have a fairly quick and easy Gothic Lace Flower (I left mine on the bumpy foam since it was really humid the day I was shooting the tutorial).


I really hope you enjoyed this tutorial – it helped me get into a dark place and come up with a few cool projects for a class I will be co-teaching with Suzanne of Savauri Sugar in early October – “Macabre Flowers”.  If you want to take part in the class, be sure to follow me on Facebook and Twitter (@morselsbymark) to keep up to date when the class is officially announced.  Also, be sure to check out the Morsels By Mark Store  where I am now making available some of the most requested tools from my classes.

Until Next Time – Happy Caking!

Sunday, June 1, 2014

New Product Review – Icing Images’ Decogel

Hey Cakeland!  

You all know I love trying the latest and [sometimes not so] greatest things hitting the cake scene.  It can be anything from a new ball tool to new molds for lace and bling.  As a blogger  and the sponsor coordinator for the Canadian Cake Decorators Guild, I am exposed to a lot, some of it good and some of it not so good.  Regardless of the outcome, I feel it my responsibility to be completely and utterly honest so that my readers benefit from my experiences.

A few weeks ago while I was at the day job droning away at my computer, I was counting down the minutes to my lunch break so I could check my personal emails and see if anything was worth reading.  Amidst the usual “lower your credit  card debt” and “increase your manhood” emails I had a few emails from people that had used the “contact me” feature on my website.  I usually save these to read when I get home as they are from potential clients or students and I want to be able to give them 100% of my time when I reply.  But that day was killing me mentally and I decided why not read them and see if any could be answered right away – for all I knew one could be a cake order and I wanted nothing better than to get my creative juices flowing!

It was not an order, but an email that would get my creativity going for sure.  It was from Theresa at Icing Images asking if I would be interested in trying out their latest product, Decogel, and possibly write about my experiences (and here we are).  I had been reading a lot about Decogel and had been intrigued by what I had seen.  Decogel is a gelatin based product that you heat up and pour into molds, lace presses, and many other applications.  It sets quite quickly (a lot faster than isomalt) and when set, looks like isomalt but has the texture of gummy candy.  We will be talking about it in our June CCDG meetings as it is the topic and sponsored item of the month, but I couldn’t wait and honestly demoing it and playing with a new item at a guild meeting doesn’t really give you the full product experience.  Needless to say, I jumped at the opportunity.  Theresa was great to speak with and even gave me an option as to what colour I would like to  sample.  Icing Images offers Decogel in 10 different colors including clear and opaque white.  I chose clear and figured I could tint it however I liked.

All I had to do now was mull over the billion ideas and designs going through my head and wait (impatiently) for my sample to arrive.  So early this week, my sample (a full 8oz container) arrived, and it was time to settle on what I was going to do.  I decided I wanted to use my new Marina Sousa molds by Marvelous Molds that I got at Icing Inspirations.  I had also seen some of the cakes using Decogel by artists that work with Icing Images on their design team (talk about my dream job) like the ever so sweet Peggy Tucker (who I did message with a couple of questions about using Decogel and she was awesome enough to answer very quickly).  Now to be quite honest, I looked at some of these cakes and thought, “Wow, they used decogel EVERYWHERE” almost to the point where I was thinking it was almost “over-decorator-itis”…..after using Decogel, I can see why it was used where ever possible – this stuff is FREAKING AWESOME!!!!!

So my design was going to incorporate yellow, black and white.  Something I hadn’t seen done on any of the cakes I looked at, were Chandelier beads.  I got my work area al set up and was ready to go.  First things first, my canvas – made sure my dummies were covered and ready to go.  Next thing I did was heat up the Decogel and cast my chandelier beads.  I am very impatient and threw the mold in the freezer to expedite the setting time.  I was able to cast all of my beads (10 strands) in about the time it would normally take me to do 2 strands in isomalt!

  I still had tons of Decogel left over, so I decided to add more to my design, I cast a clear brooch for the top tier which I very easily painted and accentuated with gold highlighter and extract.  To make it look more brooch-esque, I painted the back of the piece gold as well.  Once dry, I sprayed the entire thing with clear glaze and gave it a bit more “kapow” with some Rainbow Disco dust by my friends over at theSugarArt. 


Next up was to test its colorability.  I added a couple of drops of Black gel color (I use Luck’s brand) and gave it a quick stir.  I then cast enough jeweled diamond swags to go around the top of my yellow tier.  Now, I normally apply decorative pieces to my cakes with clear corn syrup mixed with water.  This seemed to work on the swags, but when I left the room and went back in, they had started to slide, so I peeled them all off, cleaned up my tier the best I could, and went to my next “glue” of choice – white chocolate and freeze spray – worked like a charm.

  I had finished the base of the tier with  lace border mold and black fondant.  I took a step back and found it was too dull in comparison with the top of the tier.  Low and behold, before I knew it, the fondant trim was ripped off my cake and I found myself pouring black Decogel into the same lace border mold.  This stuck to my cake no problem with my corn syrup and water glue.  

Took another step back and liked what I was seeing, so it was time to finish it off with a yellow sugar peony and buds. Here is the result:


Like anything, there are always pros and cons.  The pros to Decogel: it's easy and quick to heat, takes color easily, easy to clean spills (let set and peel up), re-heatable (virtually no waste….unlike isomalt beads, if you trim a length of beads away you toss em because they have the string inside, but with Decogel you can just easily slide them off the string) and a little goes a very long way – one 8oz tub gave me 10 chandelier strands, enough swags for the top of an 8 inch round, enough lace for the same tier, a large jewel brooch and still some leftover!  The cons – although it looks like isomalt, it doesn’t have the same rigidity.  Also if we look at cost, 8oz is 16.99 plus shipping – a bit more expensive than isomalt, but in my opinion this can be passed on to the customer and 8oz of Decogel goes way further than 8oz of isomalt would!

I am very happy to say that Decogel is definitely something I want to add to my cake decorating arsenal.  After seeing all of the possible applications for it, my mind is swirling with new decorating possibilities!!  If you have the chance to try this product, I highly recommend doing so – you won’t be sorry!

Thanks to Theresa and the fine folks at Icing Images for giving me the chance to play and stretch my imagination.  And thank you to you, my readers, who allow me to continue doing what I love – writing and sharing my passion for all things cake!  Stay tuned for more in the coming weeks and months – I have a lot of projects on the table that I am dying to try with you all!

Until next time,

Happy Caking!

Tuesday, March 25, 2014

Airbrushing 101 - What every cake artist needs to know!


One of the things I love about teaching, working for the Canadian Cake Decorator’s Guild and being present on social media, is the visibility I have to the Cake Decorating community.  As a teacher by nature, I am usually pretty giving with information and willing to answer pretty much any question.  In a recent class, my students were working on their sugar flowers and we were talking and the topic of Airbrushing came up.  In my opinion, I would say this topic comes up a lot.  Airbrushing is one of those topics that people love or are intimidated by.  I figured the blog was a perfect place to “air it all out” so to speak.

I remember my first airbrush experience like it was yesterday (maybe because 7 years later I am still finding red airbrush color every time I mop the kitchen floor).  My parents bought me a badger airbrush that I hooked up to my compressor that we around the house (tire inflations, nail guns, etc).  I had done a 3D car and wanted to airbrush it to get a truer red.  I hooked it all up, turned the compressor on and filled the reservoir with Super Red airbrush color and had at it.  The cake looked great!  My beige kitchen was now pink!  Walls, floor, ceiling….everything was covered!!  I spent more time washing everything than I did working on the cake in the end.  Lesson learned – protect your workspace.

I put the airbrush away, but took it out every now and then to play.  I just never seemed to get the control or ability for fine detail the way some of my cake heroes did, despite watching and reading countless tutorials online.  I was feeling defeated – I usually pick things up easily this way, but I just wasn’t getting it.

It wasn’t until a few years ago that my feelings for airbrushing changed.  I was at Icing Inspirations taking Rick Reichart’s Discover Your Innner Artist Class 2.  Icing Inspirations brings in the best of the best when it comes to instructors.  Rick taught us about the “anatomy of the airbrush” and how to control it.  It was then that I fell in love with my current airbrush by Grex (but that is a whole other conversation).  Taking the class just because of the airbrushing component was the best thing I ever did to hone my skills!

The reason I never took a class for airbrushing before was that I have to travel to classes, and to bring my airbrush with me would be a major pain.  The nice thing about the classes at Icing Inspirations is that the classroom is equipped with an airbrush for every single student!  That’s right – no need to bring one with you.  And if you don’t have an airbrush and have been on the fence about making the investment, then taking a class at Icing Inspirations would be ideal – you could give it a shot before making the commitment. 

 I know they have Lisa Berzcel – an acclaimed airbrush specialist – coming in May to give a series of classes for all levels on airbrushing techniques.  There are 3 different classes total each building upon skill set, and the classes are reasonably priced too.   Lisa is probably the best person to learn from when it comes to airbrushing – her work is bar none!  I am totally jealous that I can’t make this set of classes, but she is indeed on my bucket list of instructors to learn from.

 So the moral of the story is don’t think that by reading, following an online tutorial, or practicing on your own is the best way to learn airbrushing, since you will more than likely end up frustrated.  Do yourself the favor and take a class.  Invest in yourself and the skills will come.  I have gone from feeling defeated and intimidated, to being a lean mean airbrushing machine!  I airbrush pretty much anything  I can now J