Hey Cakeland!
You all know I love trying the latest and
[sometimes not so] greatest things hitting the cake scene. It can be anything from a new ball tool to
new molds for lace and bling. As a
blogger and the sponsor coordinator for
the Canadian Cake Decorators Guild, I am exposed to a lot, some of it good and
some of it not so good. Regardless of
the outcome, I feel it my responsibility to be completely and utterly honest so
that my readers benefit from my experiences.
A few weeks ago while I
was at the day job droning away at my computer, I was counting down the minutes
to my lunch break so I could check my personal emails and see if anything was
worth reading. Amidst the usual “lower
your credit card debt” and “increase
your manhood” emails I had a few emails from people that had used the “contact
me” feature on my website. I usually
save these to read when I get home as they are from potential clients or students
and I want to be able to give them 100% of my time when I reply. But that day was killing me mentally and I
decided why not read them and see if any could be answered right away – for all
I knew one could be a cake order and I wanted nothing better than to get my
creative juices flowing!
It was not an order, but
an email that would get my creativity going for sure. It was from Theresa at Icing Images asking if
I would be interested in trying out their latest product, Decogel, and possibly
write about my experiences (and here we are).
I had been reading a lot about Decogel and had been intrigued by what I
had seen. Decogel is a gelatin based
product that you heat up and pour into molds, lace presses, and many other
applications. It sets quite quickly (a
lot faster than isomalt) and when set, looks like isomalt but has the texture
of gummy candy. We will be talking about
it in our June CCDG meetings as it is the topic and sponsored item of the month,
but I couldn’t wait and honestly demoing it and playing with a new item at a
guild meeting doesn’t really give you the full product experience. Needless to say, I jumped at the
opportunity. Theresa was great to speak
with and even gave me an option as to what colour I would like to sample.
Icing Images offers Decogel in 10 different colors including clear and
opaque white. I chose clear and figured
I could tint it however I liked.
All I had to do now was
mull over the billion ideas and designs going through my head and wait
(impatiently) for my sample to arrive.
So early this week, my sample (a full 8oz container) arrived, and it was
time to settle on what I was going to do.
I decided I wanted to use my new Marina Sousa molds by Marvelous Molds
that I got at Icing Inspirations. I had
also seen some of the cakes using Decogel by artists that work with Icing
Images on their design team (talk about my dream job) like the ever so sweet
Peggy Tucker (who I did message with a couple of questions about using Decogel
and she was awesome enough to answer very quickly). Now to be quite honest, I looked at some of
these cakes and thought, “Wow, they used decogel EVERYWHERE” almost to the
point where I was thinking it was almost “over-decorator-itis”…..after using
Decogel, I can see why it was used where ever possible – this stuff is FREAKING
AWESOME!!!!!
So my design was going to
incorporate yellow, black and white.
Something I hadn’t seen done on any of the cakes I looked at, were
Chandelier beads. I got my work area al
set up and was ready to go. First things
first, my canvas – made sure my dummies were covered and ready to go. Next thing I did was heat up the Decogel and
cast my chandelier beads. I am very
impatient and threw the mold in the freezer to expedite the setting time. I was able to cast all of my beads (10
strands) in about the time it would normally take me to do 2 strands in
isomalt!

I still had tons of Decogel
left over, so I decided to add more to my design, I cast a clear brooch for the
top tier which I very easily painted and accentuated with gold highlighter and
extract. To make it look more
brooch-esque, I painted the back of the piece gold as well. Once dry, I sprayed the entire thing with
clear glaze and gave it a bit more “kapow” with some Rainbow Disco dust by my
friends over at theSugarArt.

Next up was to test its
colorability. I added a couple of drops
of Black gel color (I use Luck’s brand) and gave it a quick stir. I then cast enough jeweled diamond swags to
go around the top of my yellow tier.
Now, I normally apply decorative pieces to my cakes with clear corn syrup
mixed with water. This seemed to work on
the swags, but when I left the room and went back in, they had started to
slide, so I peeled them all off, cleaned up my tier the best I could, and went
to my next “glue” of choice – white chocolate and freeze spray – worked like a
charm.

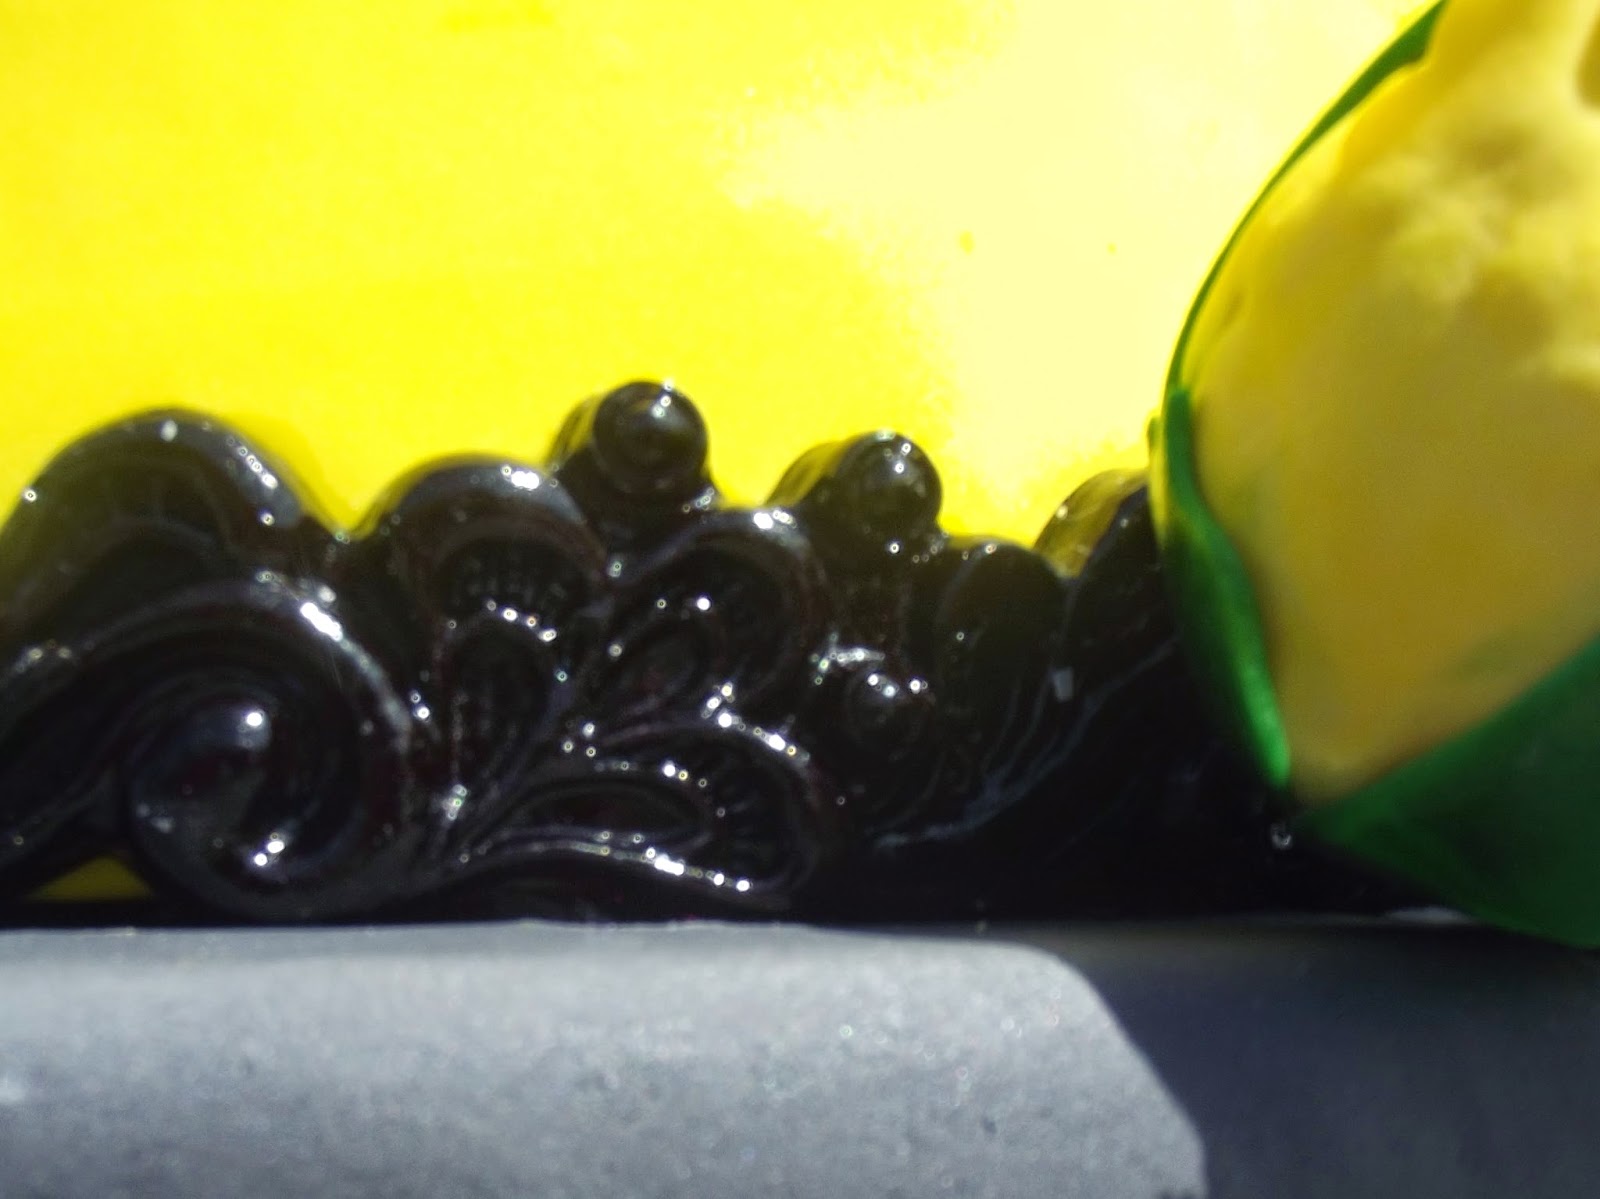
I had finished the base of the
tier with lace border mold and black
fondant. I took a step back and found it
was too dull in comparison with the top of the tier. Low and behold, before I knew it, the fondant
trim was ripped off my cake and I found myself pouring black Decogel into the
same lace border mold. This stuck to my
cake no problem with my corn syrup and water glue.
Took another step back and liked what I was
seeing, so it was time to finish it off with a yellow sugar peony and buds.
Here is the result:

Like anything, there are
always pros and cons. The pros to
Decogel: it's easy and quick to heat, takes color easily, easy to clean spills (let
set and peel up), re-heatable (virtually no waste….unlike isomalt beads, if you
trim a length of beads away you toss em because they have the string inside,
but with Decogel you can just easily slide them off the string) and a little
goes a very long way – one 8oz tub gave me 10 chandelier strands, enough swags
for the top of an 8 inch round, enough lace for the same tier, a large jewel
brooch and still some leftover! The cons
– although it looks like isomalt, it doesn’t have the same rigidity. Also if we look at cost, 8oz is 16.99 plus
shipping – a bit more expensive than isomalt, but in my opinion this can be
passed on to the customer and 8oz of Decogel goes way further than 8oz of
isomalt would!
I am very happy to say
that Decogel is definitely something I want to add to my cake decorating
arsenal. After seeing all of the possible
applications for it, my mind is swirling with new decorating
possibilities!! If you have the chance
to try this product, I highly recommend doing so – you won’t be sorry!
Thanks to Theresa and the
fine folks at Icing Images for giving me the chance to play and stretch my
imagination. And thank you to you, my
readers, who allow me to continue doing what I love – writing and sharing my
passion for all things cake! Stay tuned
for more in the coming weeks and months – I have a lot of projects on the table
that I am dying to try with you all!
Until next time,
Happy Caking!

