Hi Cakeland! I am so happy summer is finally here – better
late than never I say. One of the things
I love about being in this industry, is the people I get to talk to and deal
with on a regular basis. Now you all
know I am a cake toy JUNKIE! Imagine my
excitement that day in May when I get a text from my BCF (for you newbies,
that’s Best Cake Friend) telling me to go check out the new products up for
pre-order online at her store Icing Inspirations. They were called “Onlays” ….
My Icing Inspirations Onlay Order (plus some other cool stuff)
I picked two onlays for
my first attempt – took every ounce of my being to edit it down and stick to a
simple, yet elegant design. The onlays I
used for this tutorial are called ooh la la (top tier) and double wedding ring
(bottom).
I started with 3 dummies covered in pink fondant. The middle tier was hand painted with silver highlighter mixed with lemon extract.
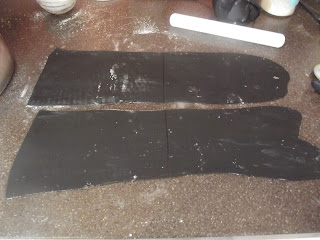
To do the bottom tier, I rolled black fondant mixed with a bit of gum tragacanth (Fondarific is my fondant of choice) the width of my Kitchenaid Pasta roller attachment to a number 2 – very important to note: the “cutting blades” on the onlay are the perfect height for a 2 on the KA. Tip: Roll and cut all of the pieces you will need and keep them under layers of plastic wrap.
I lightly corn starched the onlay and tapped the excess out.
Place the piece of fondant on the onlay and press well to “cut” your pattern. Brush the back of the design with adhesive (I love this edible sugar glue by Rainbow Dust).
Remove the negative spaces (those areas you don’t want attached to the cake). Line the straight edge of the onlay flush with the base of the tier and rub/press the silicone to get a good adhesion to the cake.
Continue this until you
get the desired look you want.
Something
awesome that Chef Dominic has done is to create the onlays to be 2 times pi
long. For the not so math savvy, this is
exciting because it means that on any EVEN diameter round cake, you will get
perfect fitting without any seams meaning on a 6 inch round, 3 onlays fit
perfect (8 inch uses 4, 10 inch uses 5, 12 uses 6, so on and so forth). The Onlays are also constructed to line up to one another perfectly as you can see in the picture above.
I allowed the fondant to
dry a bit before painting silver with the same mixture I used on the middle
tier.
I repeated the process
with the ooh la la onlay on the top tier, except I placed it in the middle of
the tier.
Stack your cakes and
embellish your cake drum as desired.
The other buttons were made same way (sans wire) and allowed to dry. I painted all of the buttons with a silver paint pen by Rainbow dust. And brushed the center with sugar glue and dipped in pink disco dust.
The flower petals were
made using Peony cutters by Collette Peters (2nd and 4th biggest).
I veined the wired petals using James Rosselle’s Parrot Tulip veiner and
dried in an empty apple tray.
To get the curl on the tips, I simpleyplaced my ball tool on the top edge of the petal and using firm pressure, bring it towards the center.
The petals were then dusted in Hot Pink petaldust and steamed to set the color. I taped the petals around the center, and voila – a gorgeous fantasy flower!
To get the curl on the tips, I simpleyplaced my ball tool on the top edge of the petal and using firm pressure, bring it towards the center.
The petals were then dusted in Hot Pink petaldust and steamed to set the color. I taped the petals around the center, and voila – a gorgeous fantasy flower!
Using white chocolate, I
attached 5 buttons to the top tier and placed the flower. Trim the cake seams with diamanite ribbons.
The onlays went on the tiers so easy and made the cake look very sophisticated! Best of all, my decorating time was cut down immensely!
The finished cake!
I have already ordered the majority of the onlays and will be finishing off the set shortly. I have already heard from a contact of mine from Marvelous Molds, that these are the first patterns in a series, and new patterns will be added in time - I. CAN’T. WAIT!!
If you wanna get your
hands on some onlays, head over to the Marvelous Molds site. They retail for between 12 & 29 dollars – very reasonable for the quality you get! Everything (including Onlays) I used on the cake for the tutorial is available at Icing Inspirations (links to individual items are included wherever possible ;) ).
Keep your eyes posted
here for more product reviews and tutorials in the future.
Happy Caking!


.jpg)


Thank you for sharing these tips. The finished cake looks fab!
ReplyDelete